

The theme of the month has been to celebrate the launch of Blaise’s new book of poems, Zeppelin (Nightwood Editions, 2013).
We had been searching around for a while to try and find him a set of zeppelin cookie cutters. We finally found some cute ones on Etsy, but they weren’t quite the right shape (the airship on B’s book is long and narrow, not quite so blimpy), so we decided to make some ourselves! Rather than going the home depot route for plumber’s strapping or strips of copper or aluminum (though, we were sorely tempted!), we decided to hit the dollar store for some work gloves and el cheapo aluminum baking pans. Cost of our supplies? $2.26 – and we could have made about 4 more cutters from the supplies we had!!
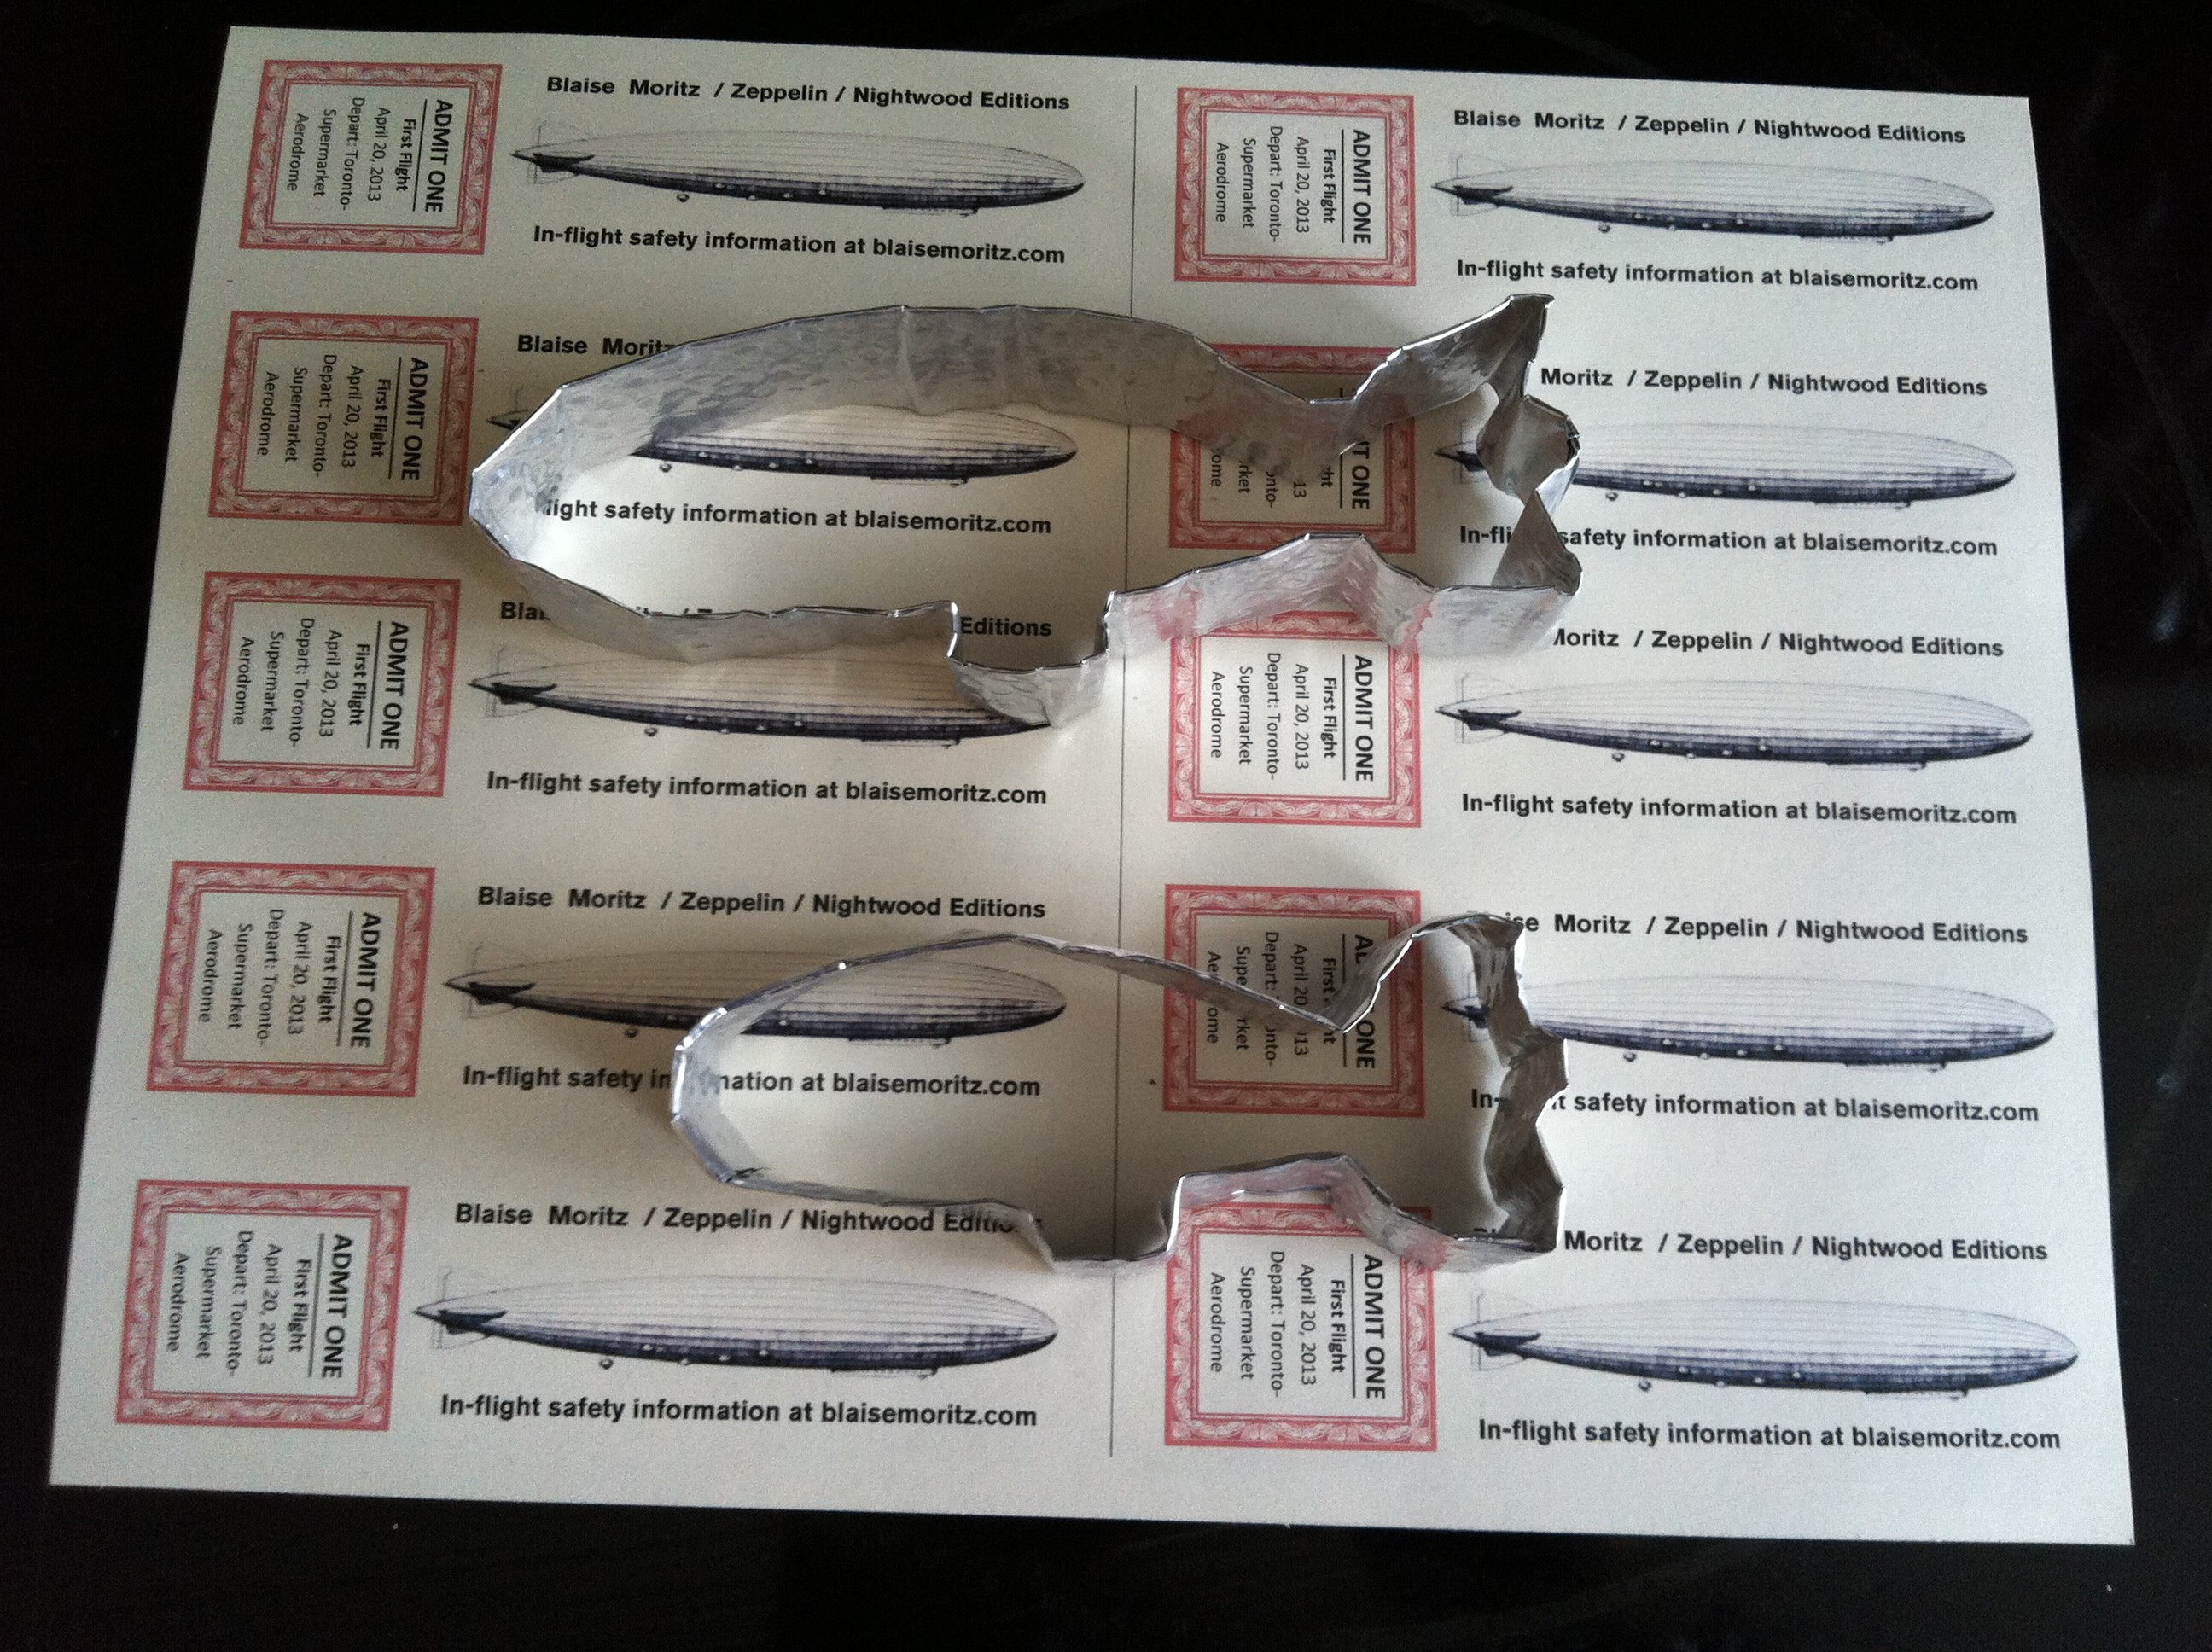
DIY Cookie Cutters: The Zeppelin Edition
Supplies
Disposable Aluminum Lasagna Style-Pan or Pan Lid [we only used the lid]
Scissors
Work Gloves
Ruler or Folding Bone
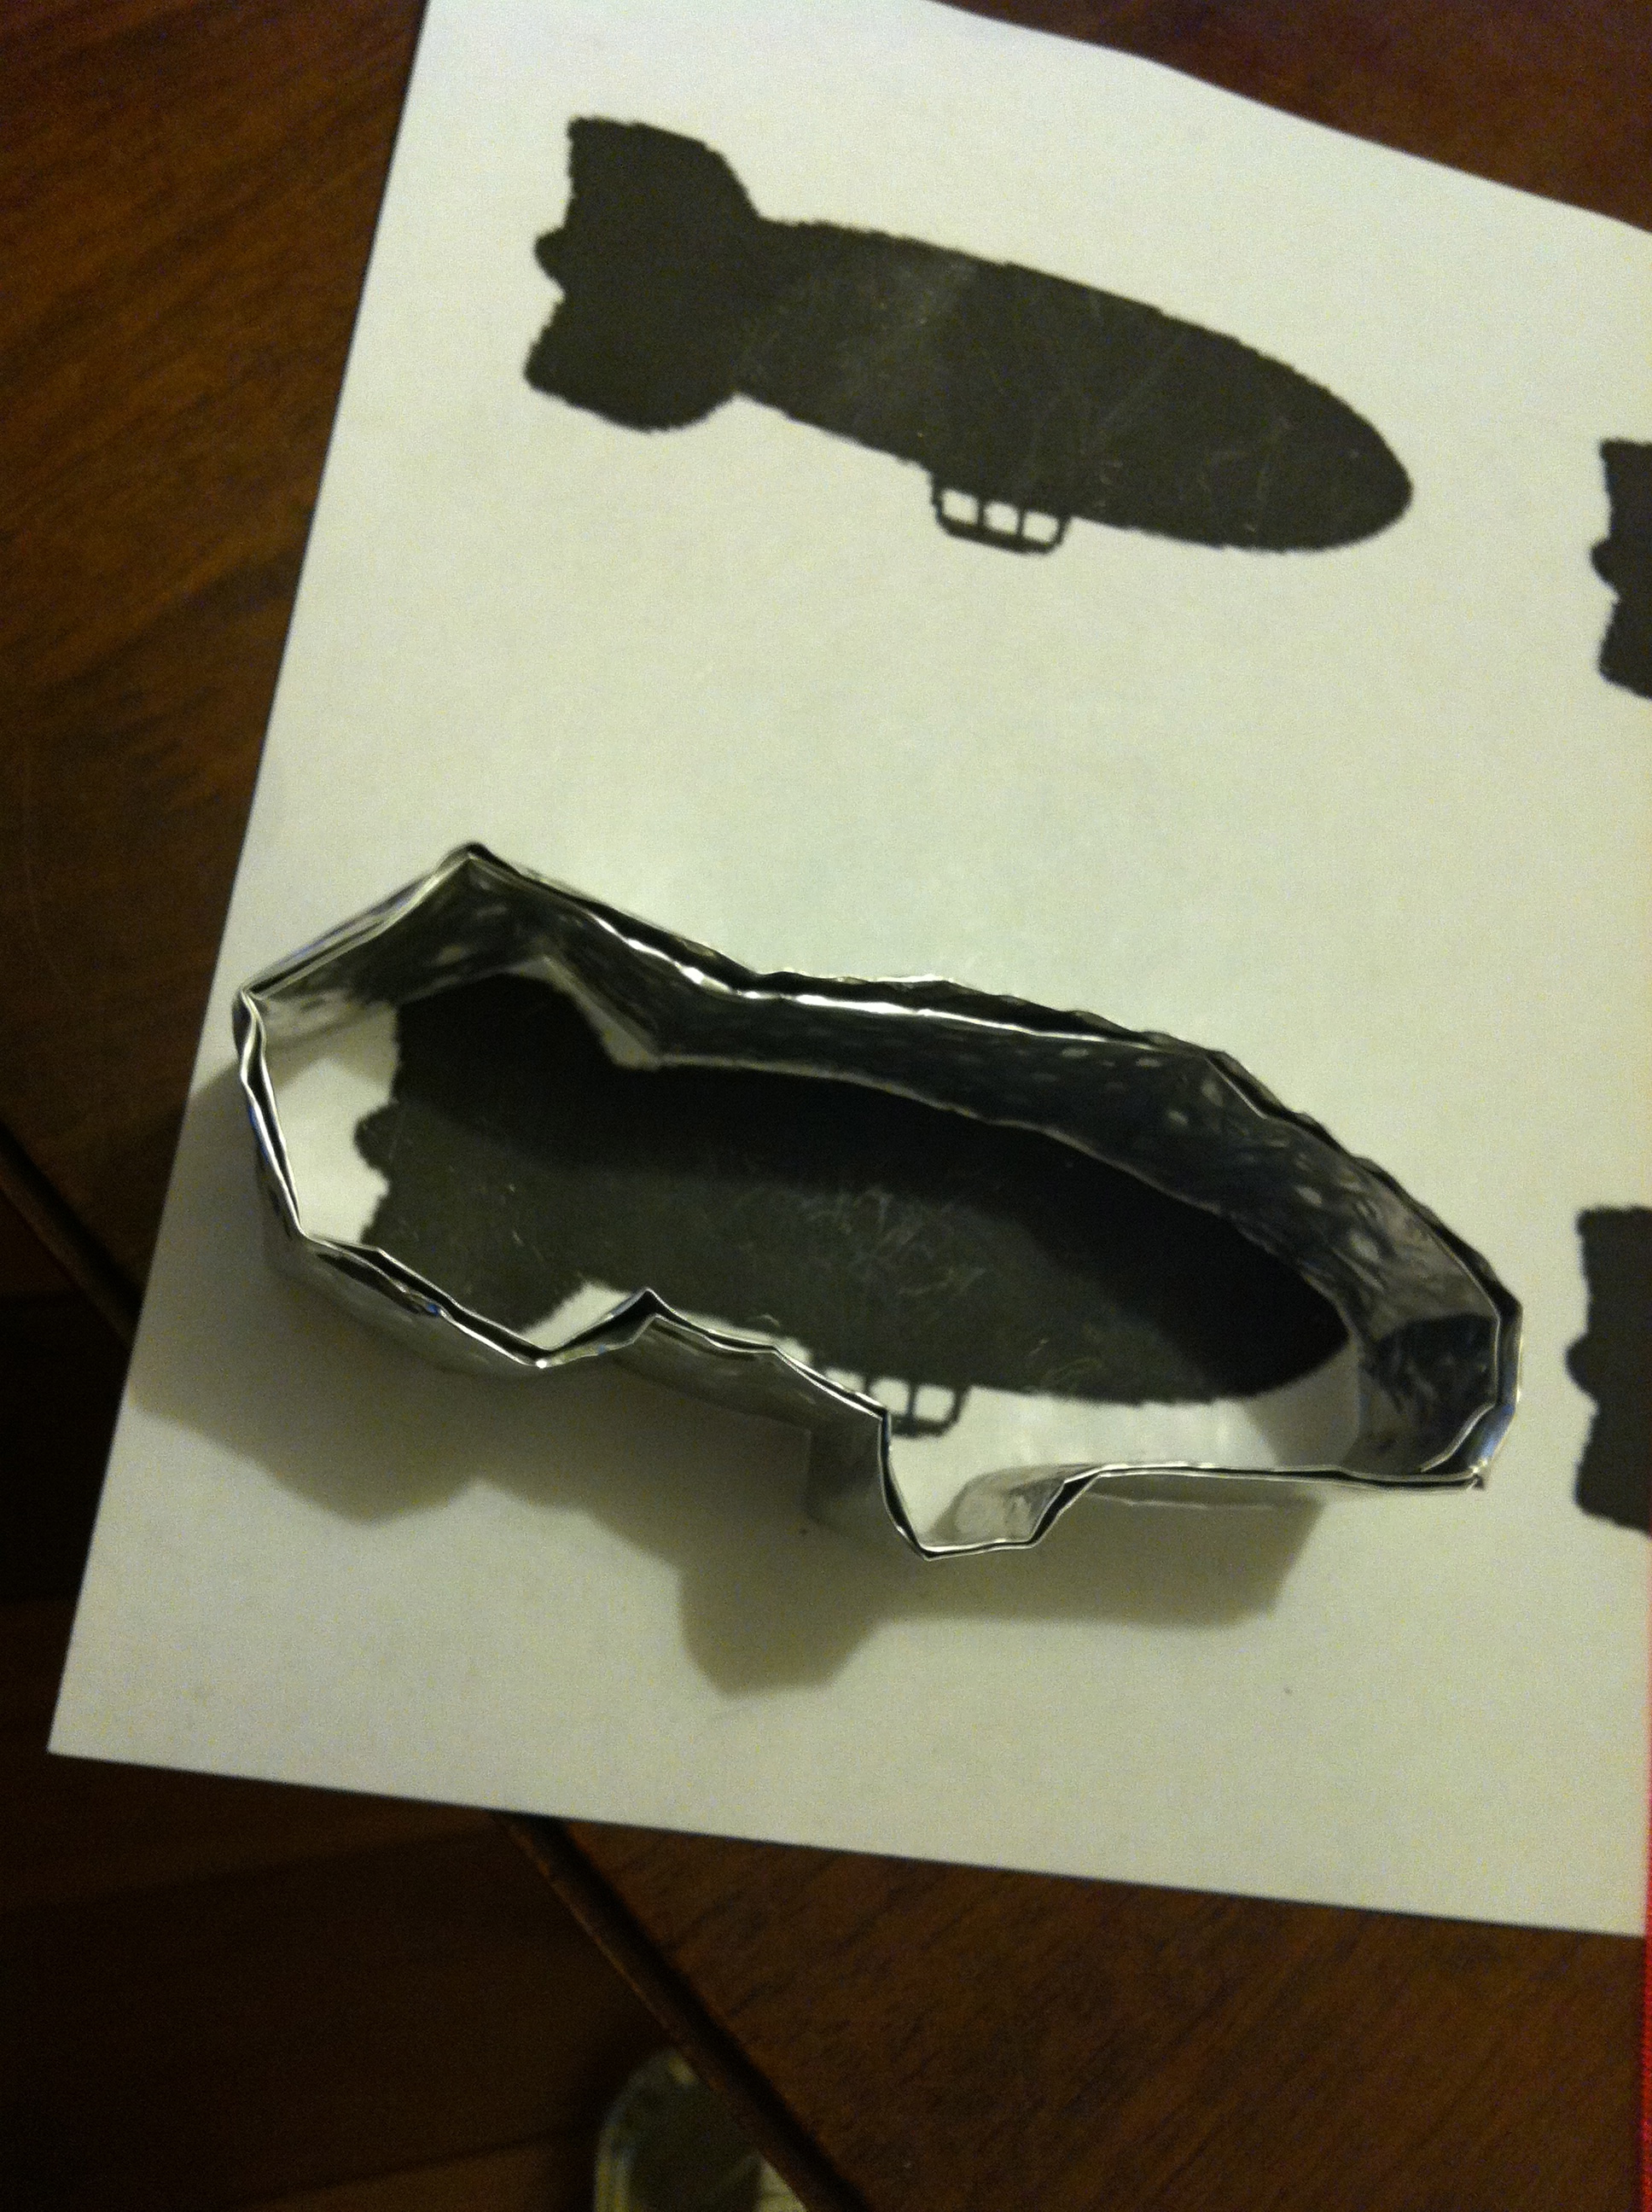
[Optional] A Printed Silhouette of Your Desired Shape [We just googled “Zeppelin Silhouette”]
[Optional] Ruler and Pencil for shaping
Method
Wearing gloves, cut a long rectangle shape [about 4 inches wide] from the aluminum pan or lid.
Fold the aluminum in half lengthwise and re-open it.
Fold each of the sharp long edges of the aluminum inward toward the crease.
Refold the aluminum along the original crease so that you have a long lovely aluminum strip with no exposed sharp long edges.


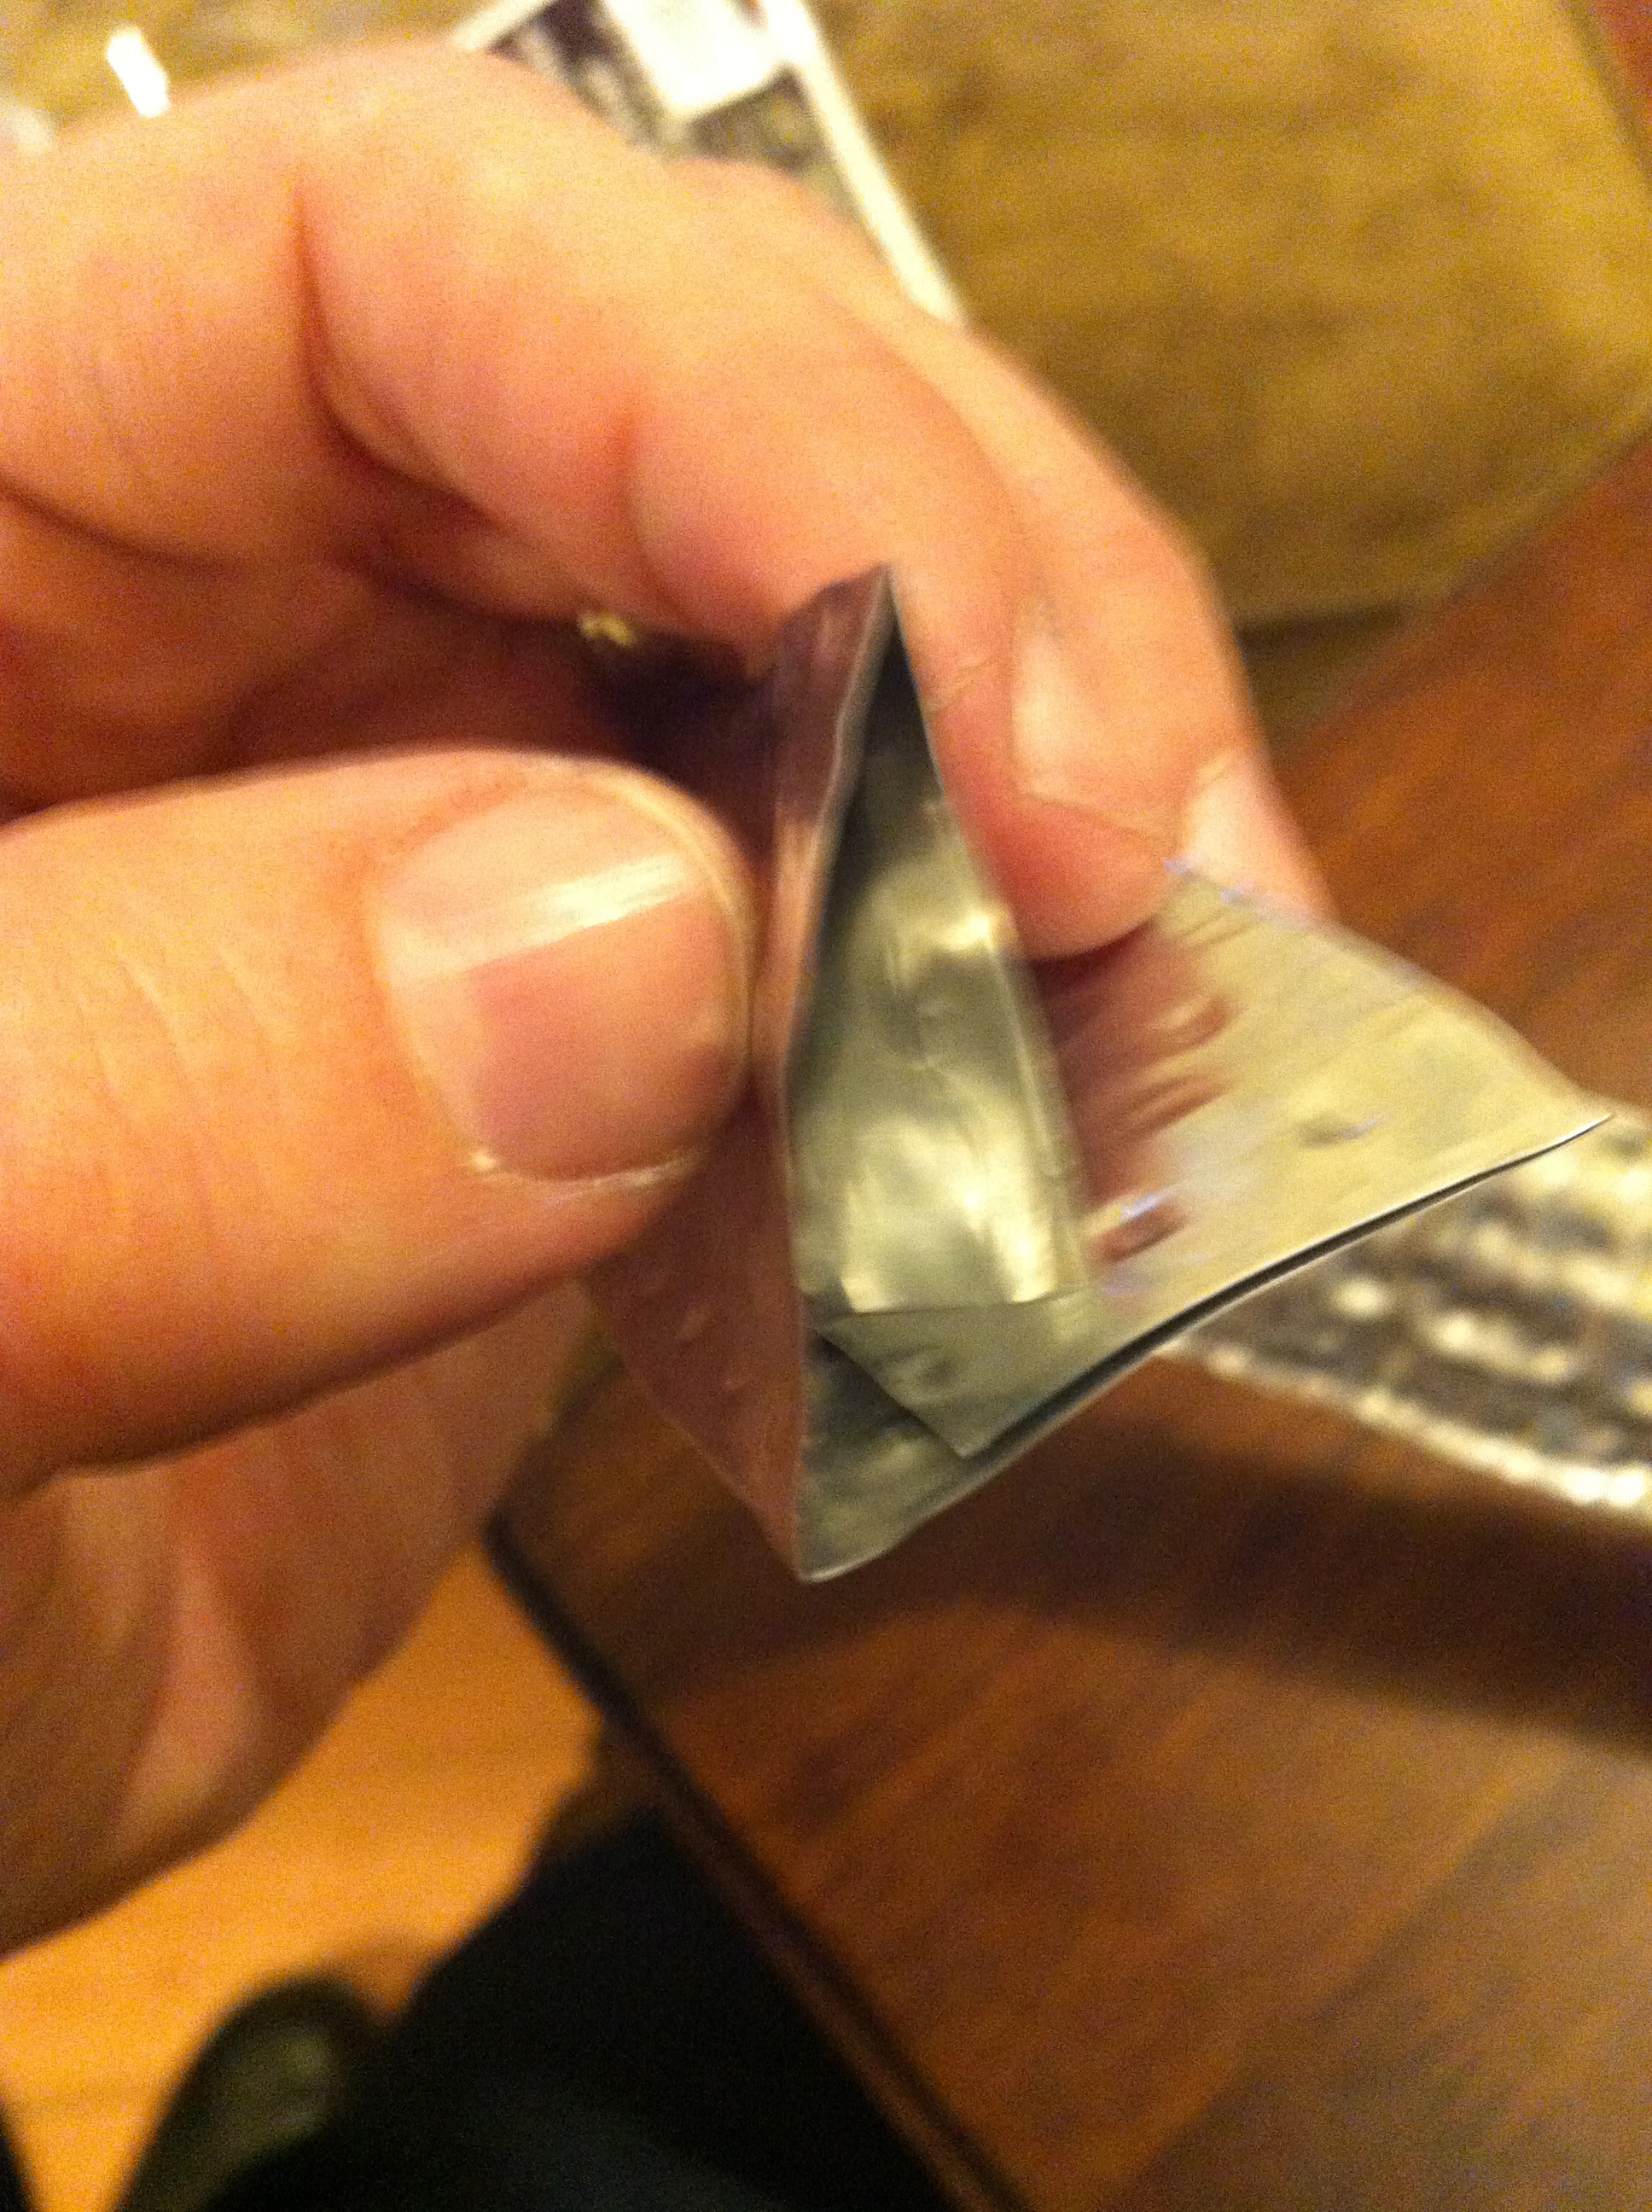
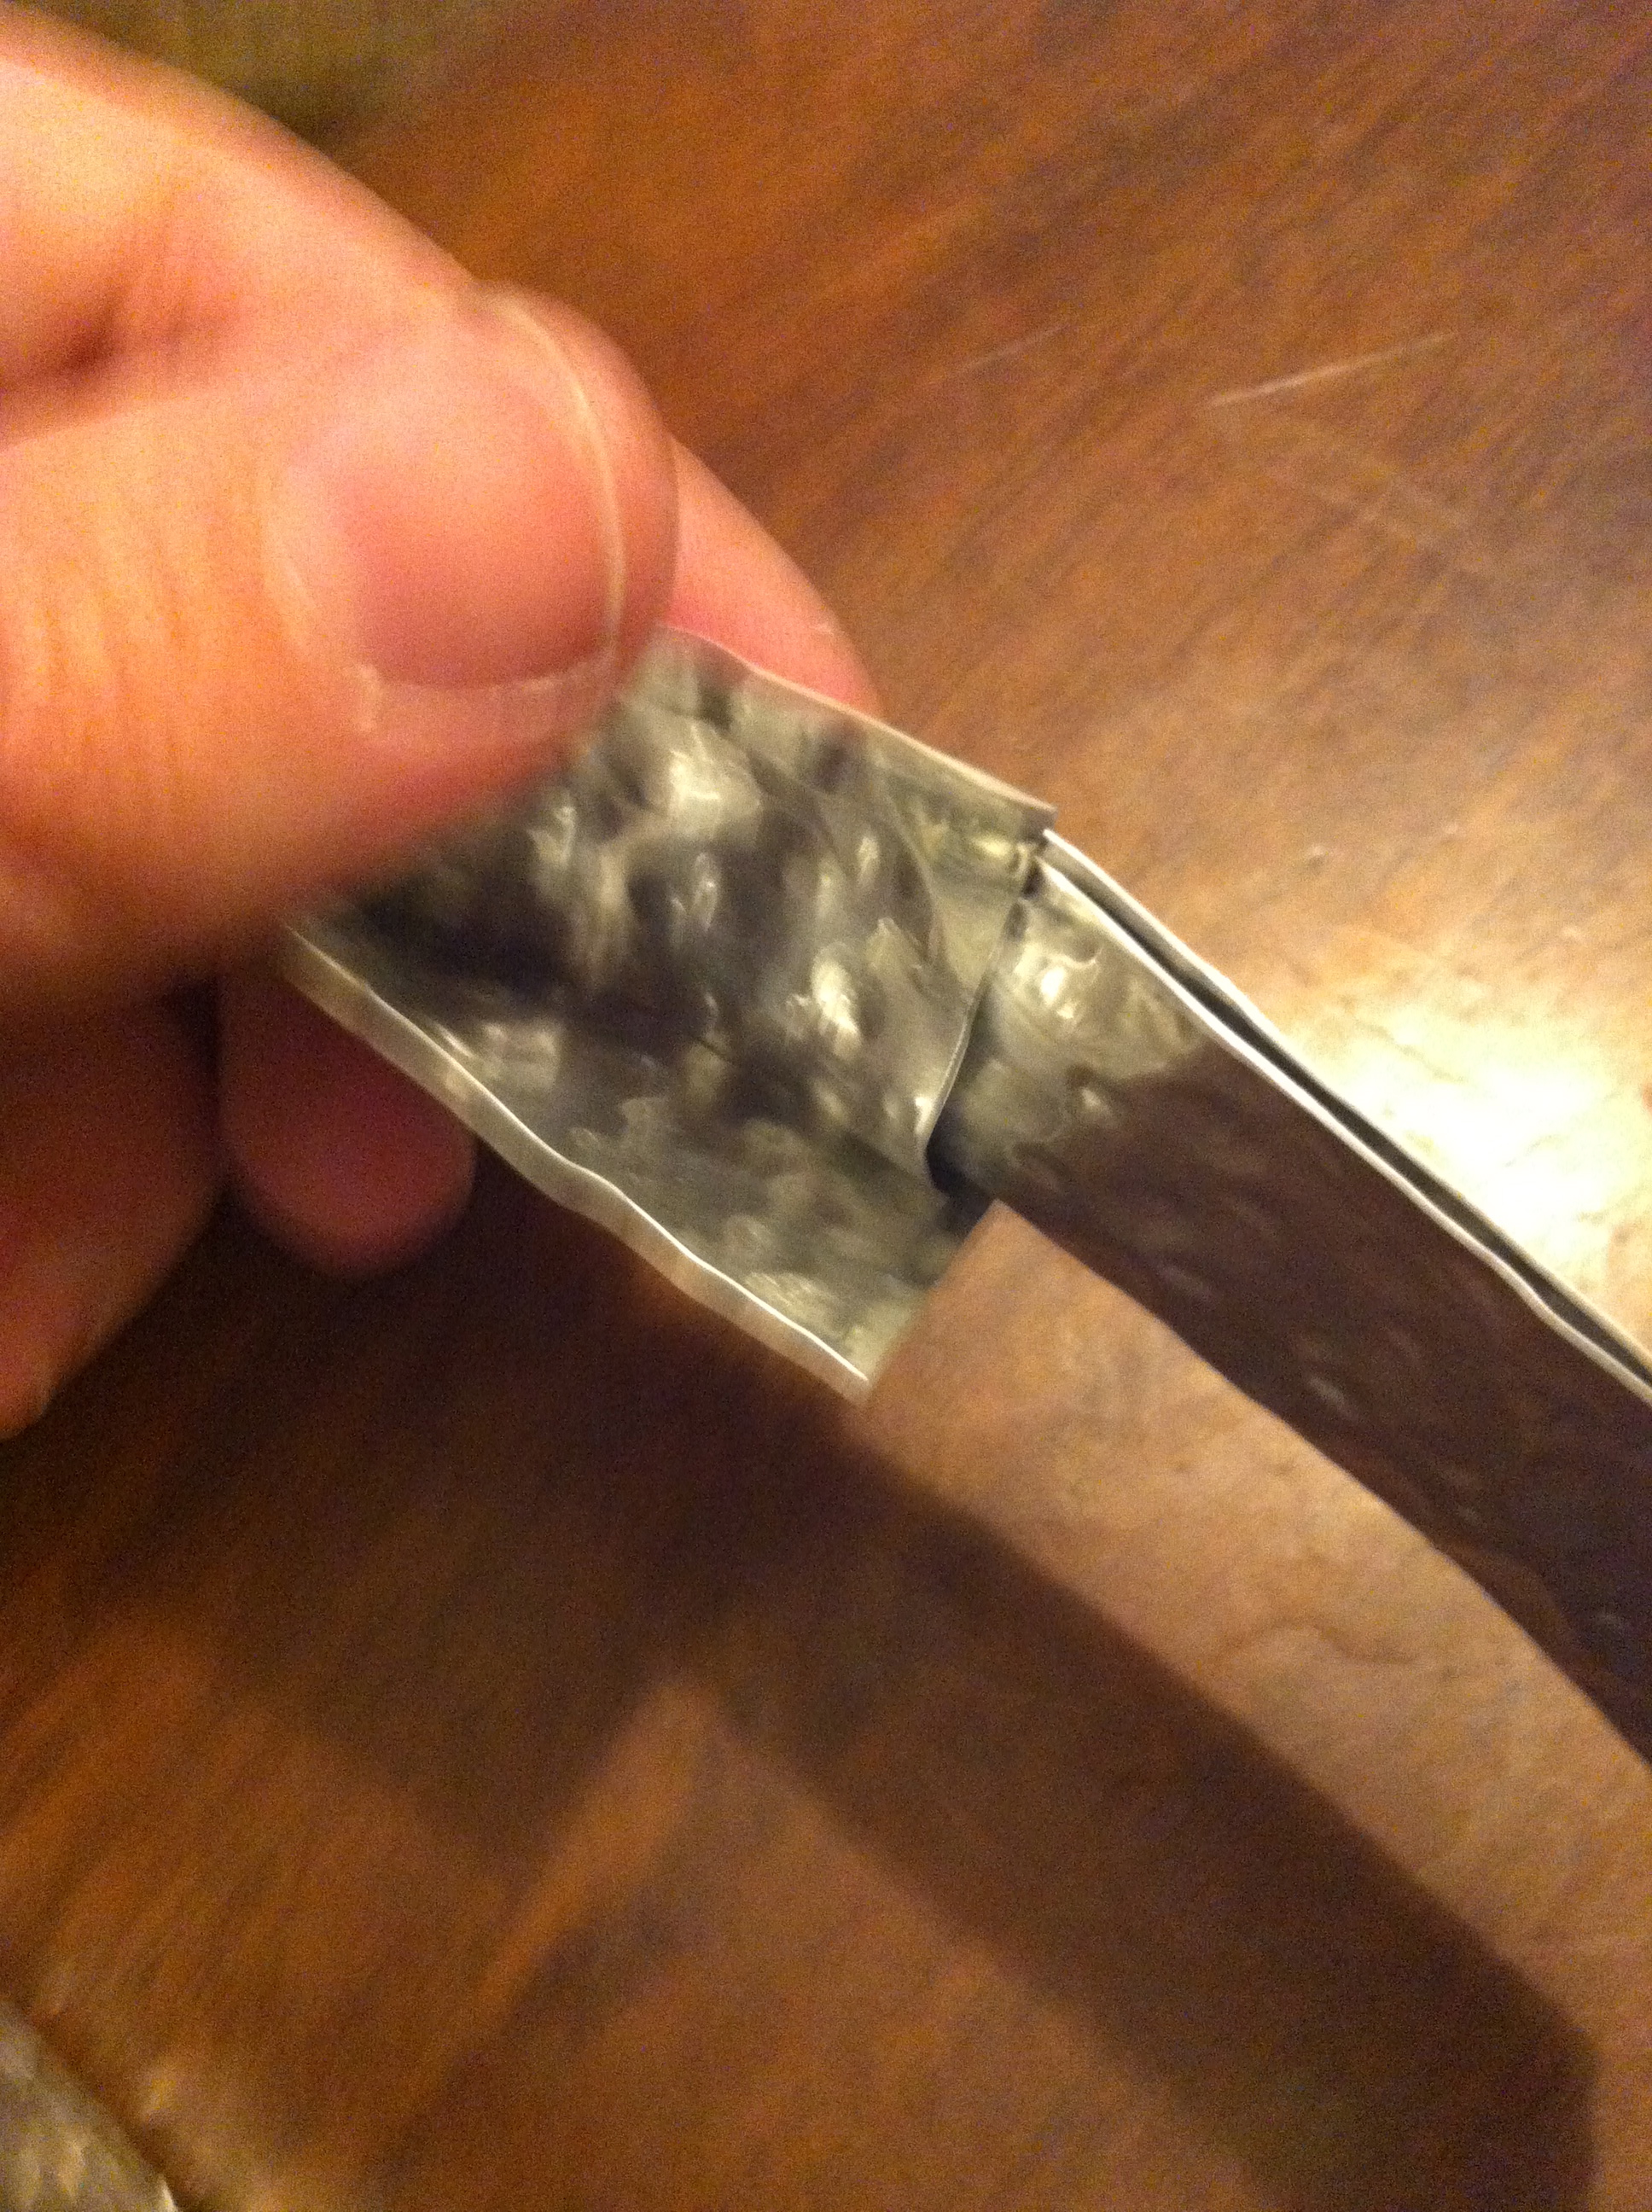
Once you have your aluminum strip, begin to shape it into a ring so that the short edges meet.
Carefully insert one of the short edges into ONE of the v flaps of other short edge as shown below.
We had about an inch of overlap.
Crimp the v-flap shut again.
No glues or fixatives needed. It just stays put!

Using your printed silhouette as a guide, begin to form your aluminum ring into the desired shape.
[We left the “join” of our ring in the wide tail part of our airship.]
Use rulers to help make sharp bends and pencils or markers to help make curved bends in your shape.
When you have finished making your cutter, be sure to “cut” your cookies using the side of the cutter which is folded as opposed to the double-edged side.
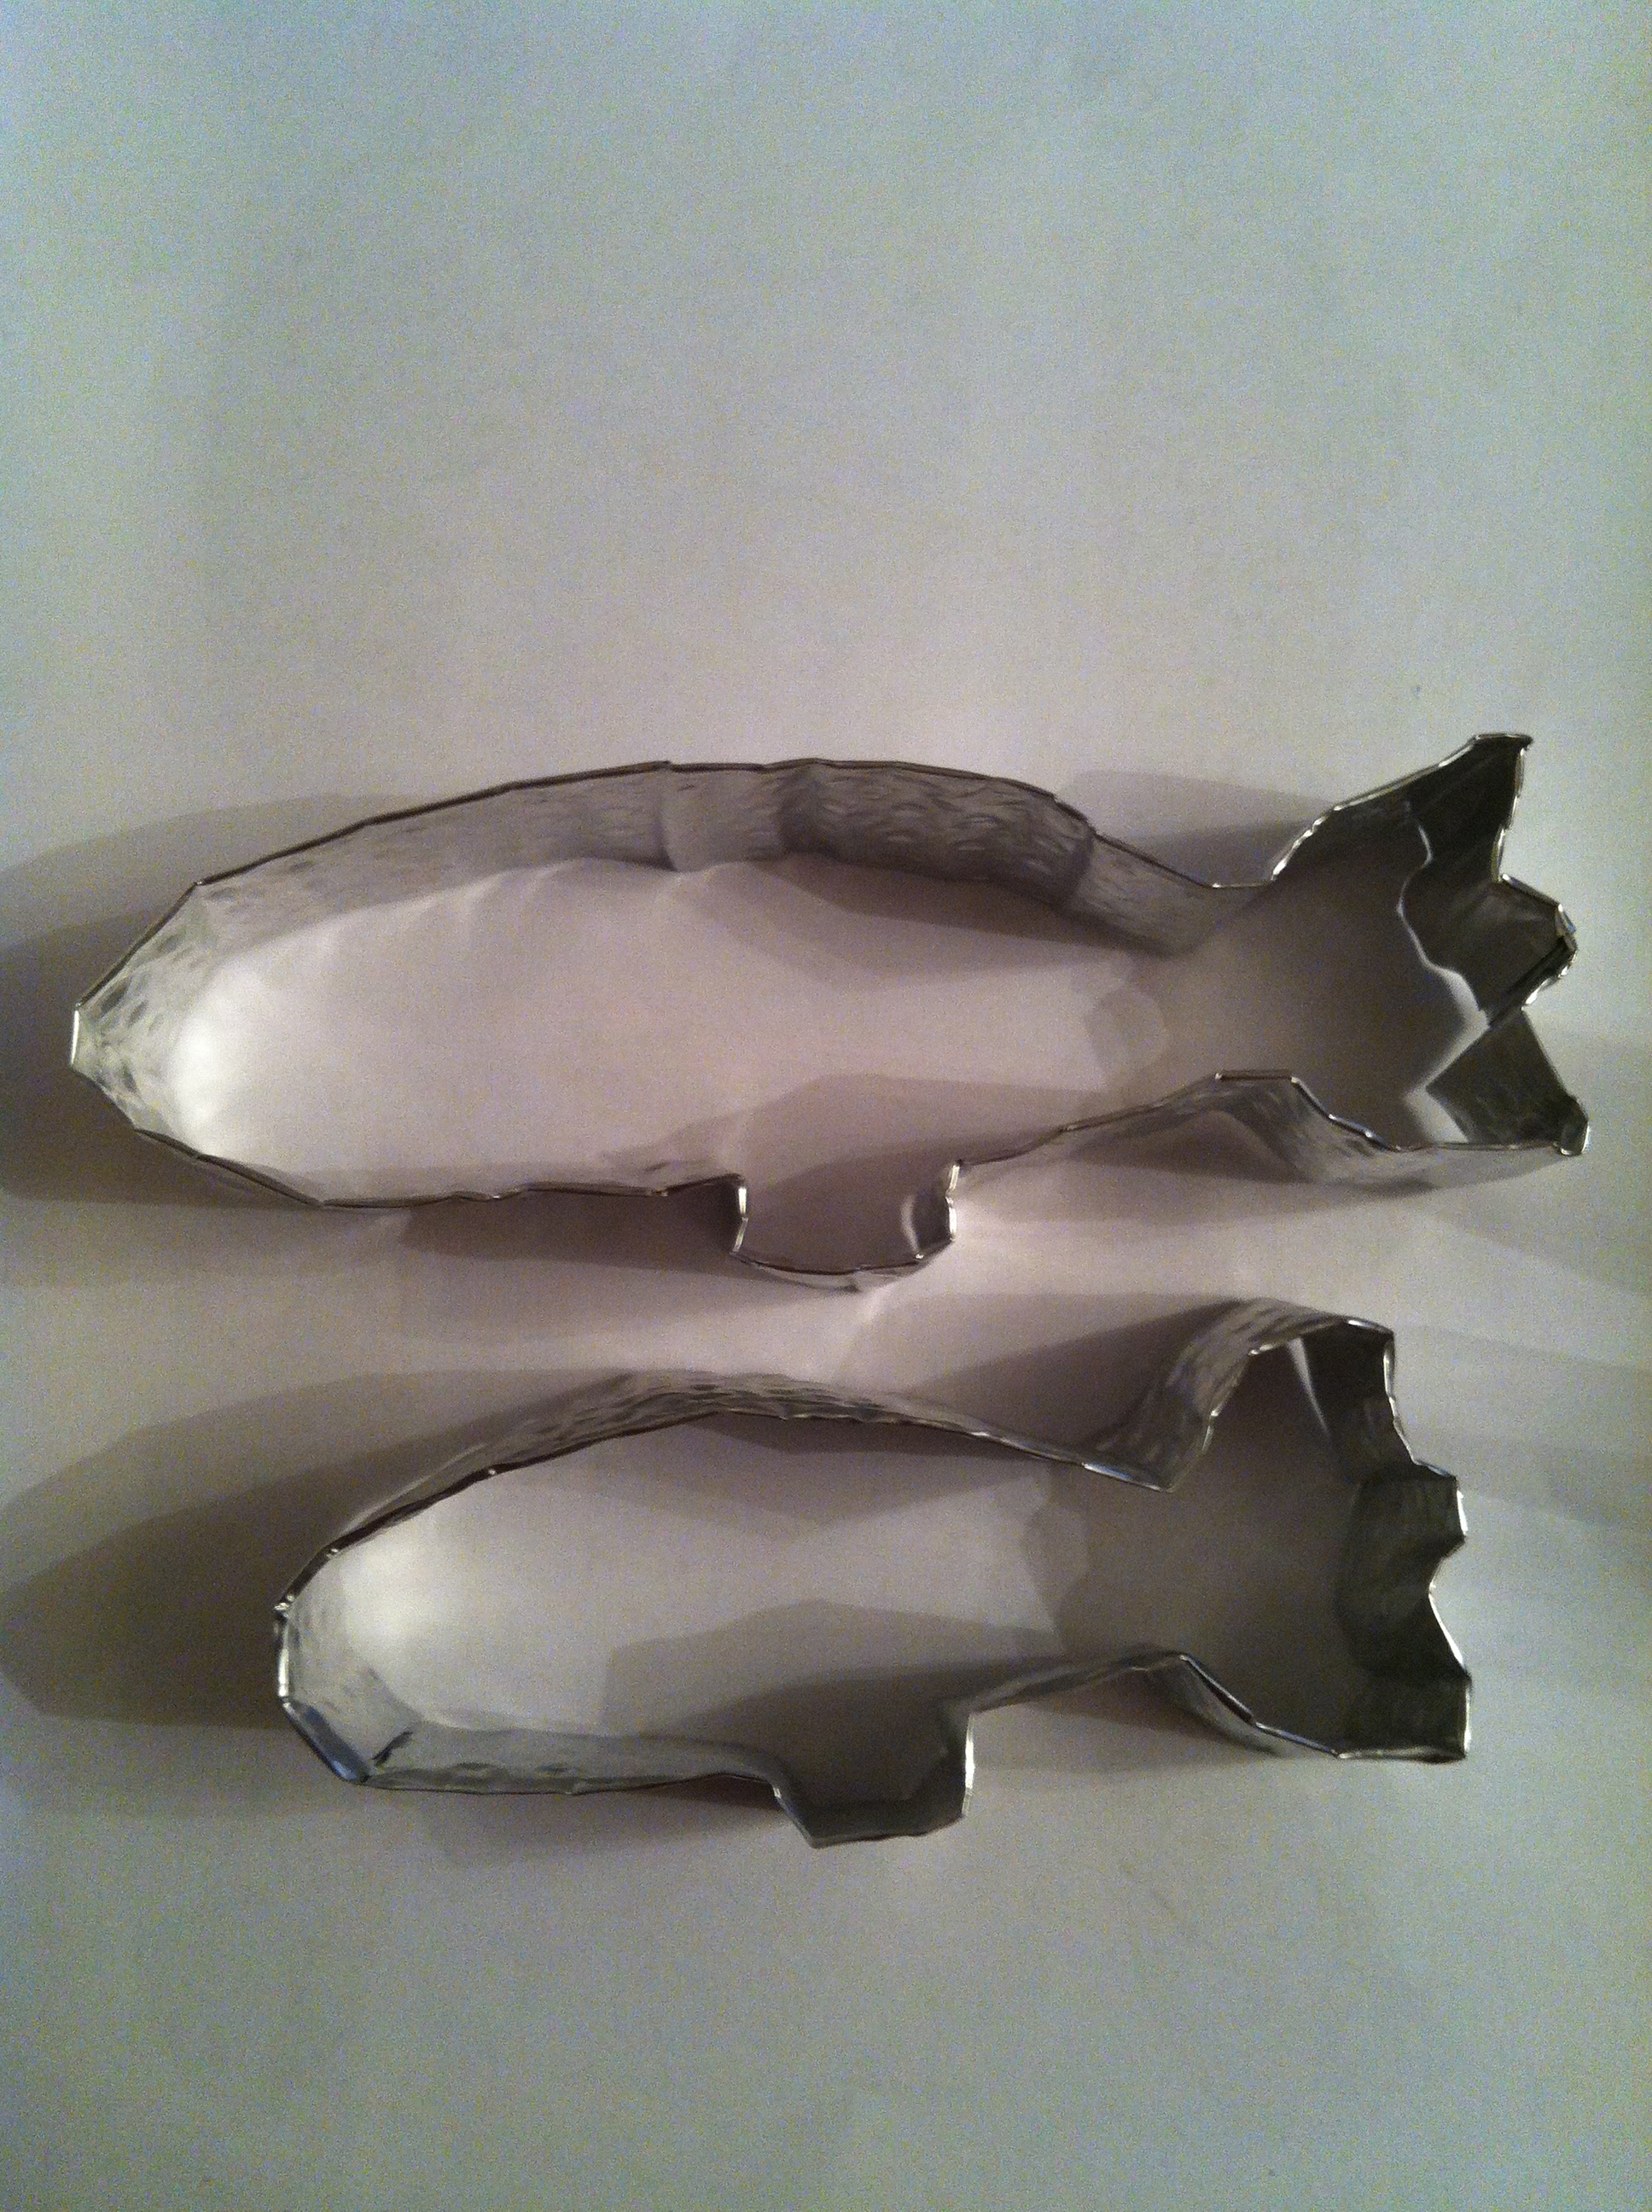

Et voila! You’re done!
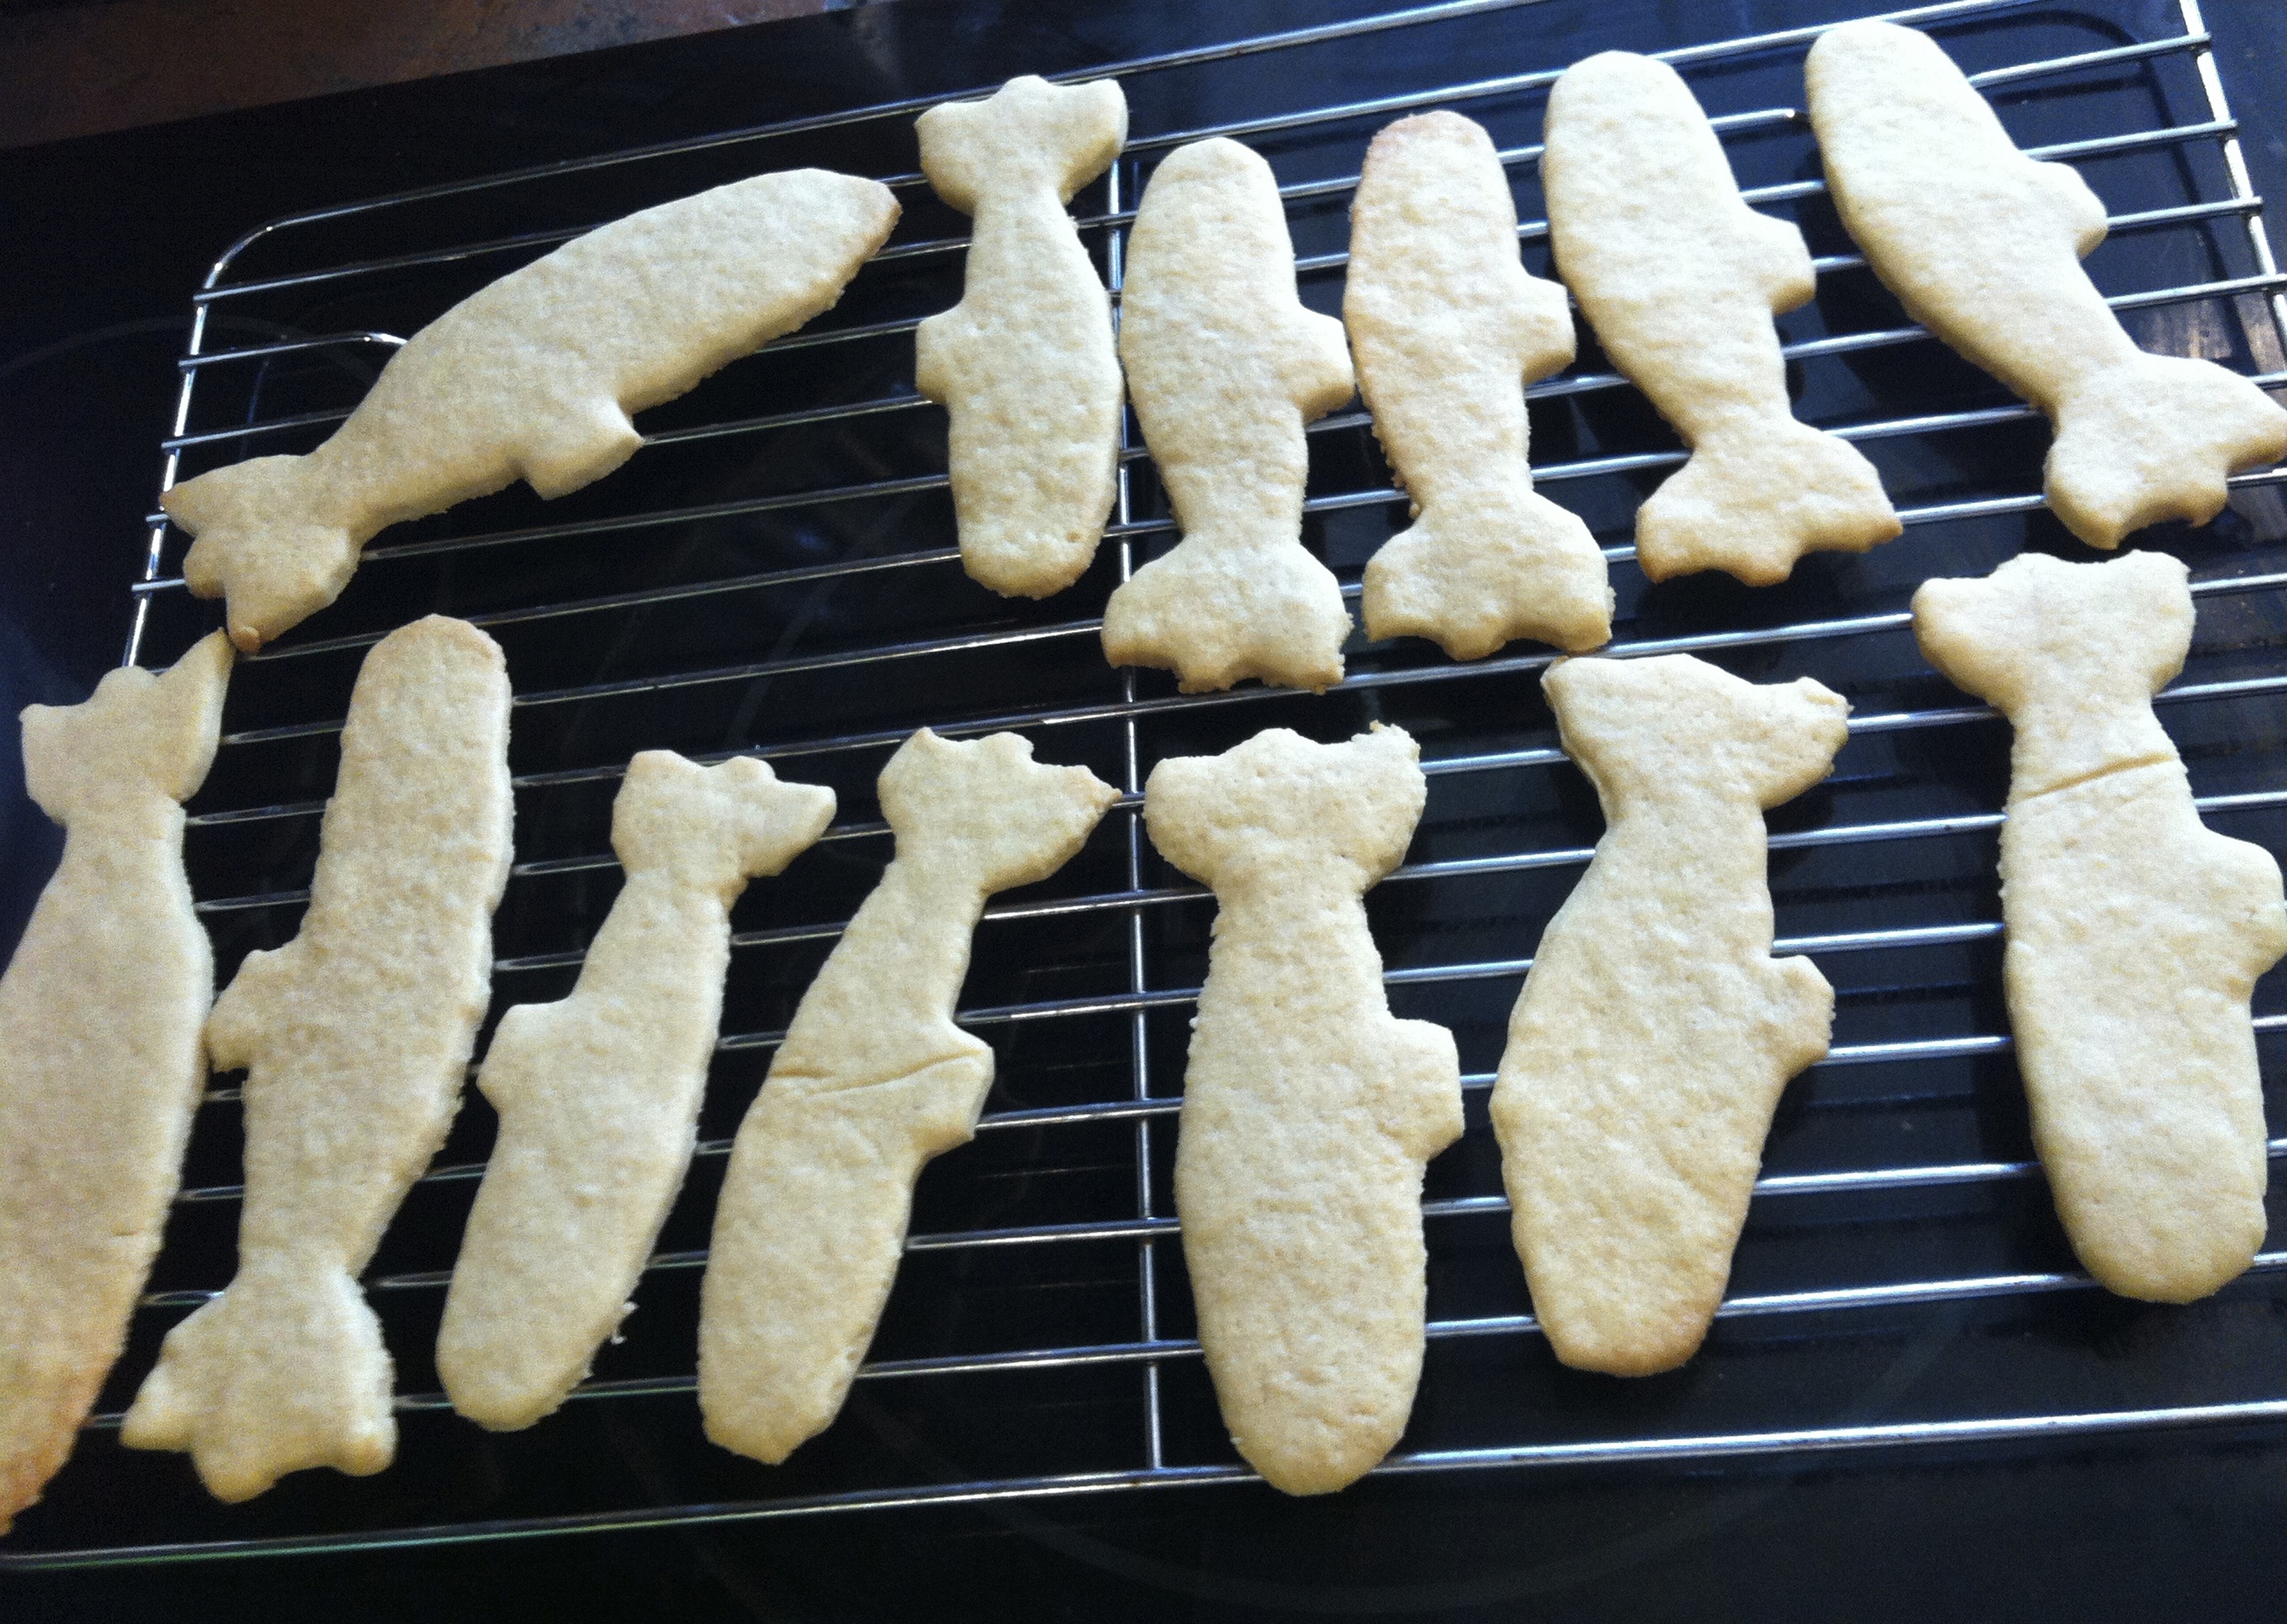
Here’s a recipe to get you started on your own zeppelins or other designs!

Zeppelin Sugar Cookies
makes 30+ cookies
Ingredients
2/3 cup unsalted butter
3/4 cup brown sugar
1 egg
1 tbs milk
2 tsp vanilla
1 tsp baking powder
.5 tsp salt
2 cups flour
for the icing
2 cups icing sugar
.5 c milk (to be added by the tablespoon)
blue and red food colouring (we actually used neon blue and neon fuscia)
Method
Preheat oven to 350 degrees Farenheit.
Cream your butters and sugars before adding the remainder of the wet ingredients.
Then, sift in the dry ingredients.
Once the dough forms into a ball, divide it in half and wrap each half in plastic film.
Refrigerate the dough for an hour or so (if you can wait that long!).
Roll refrigerated dough to between 1/4 and 1/8 of an inch.
To make things quick and easy, I roll my dough between sheets of waxed or parchment paper.
Cut and press cookies with the finer side of your zeppelin cutter and place them on parchment lined cookie sheets.
Bake for 7-9 minutes.
Cool on wire racks.
Add milk to the icing sugar by the tablespoon until it reaches a spreadable consistency.
Add food colouring to make a turqouise icing.
Ice the cookies and let the icing set completely.
Add the fuscia icing to the remaining turquoise icing to create a dark purple.
Use a butter knife to create lines and dimension on the zeppelin cookie.
Allow icing to set completely.
Enjoy!


Comments are closed.